
 My husband made one of these last year on a whim and proceeded to fill our yard with six more this
We are going to be making a few more in the coming months so I'm hoping to add more pictures of the process but this is all I've got so far:
The base is made from wire mesh used in concrete work that can be purchased by the roll at Home Depot/Lowe's (usually with the concrete mixes). Be careful working with this stuff, it'll get you if you're not careful, it's very sharp and has a mind of its own.
First, cut it into 14' lengths, one square wide (these are large orbs, guessing roughly 5' in diameter, do your math, you know, the stuff we all said we'd never use, to change the sizing). Hint: have someone stand on the end as you unroll or it'll fling itself right back at ya'. Once it's unrolled and cut to length flip it upside down to continue cutting.

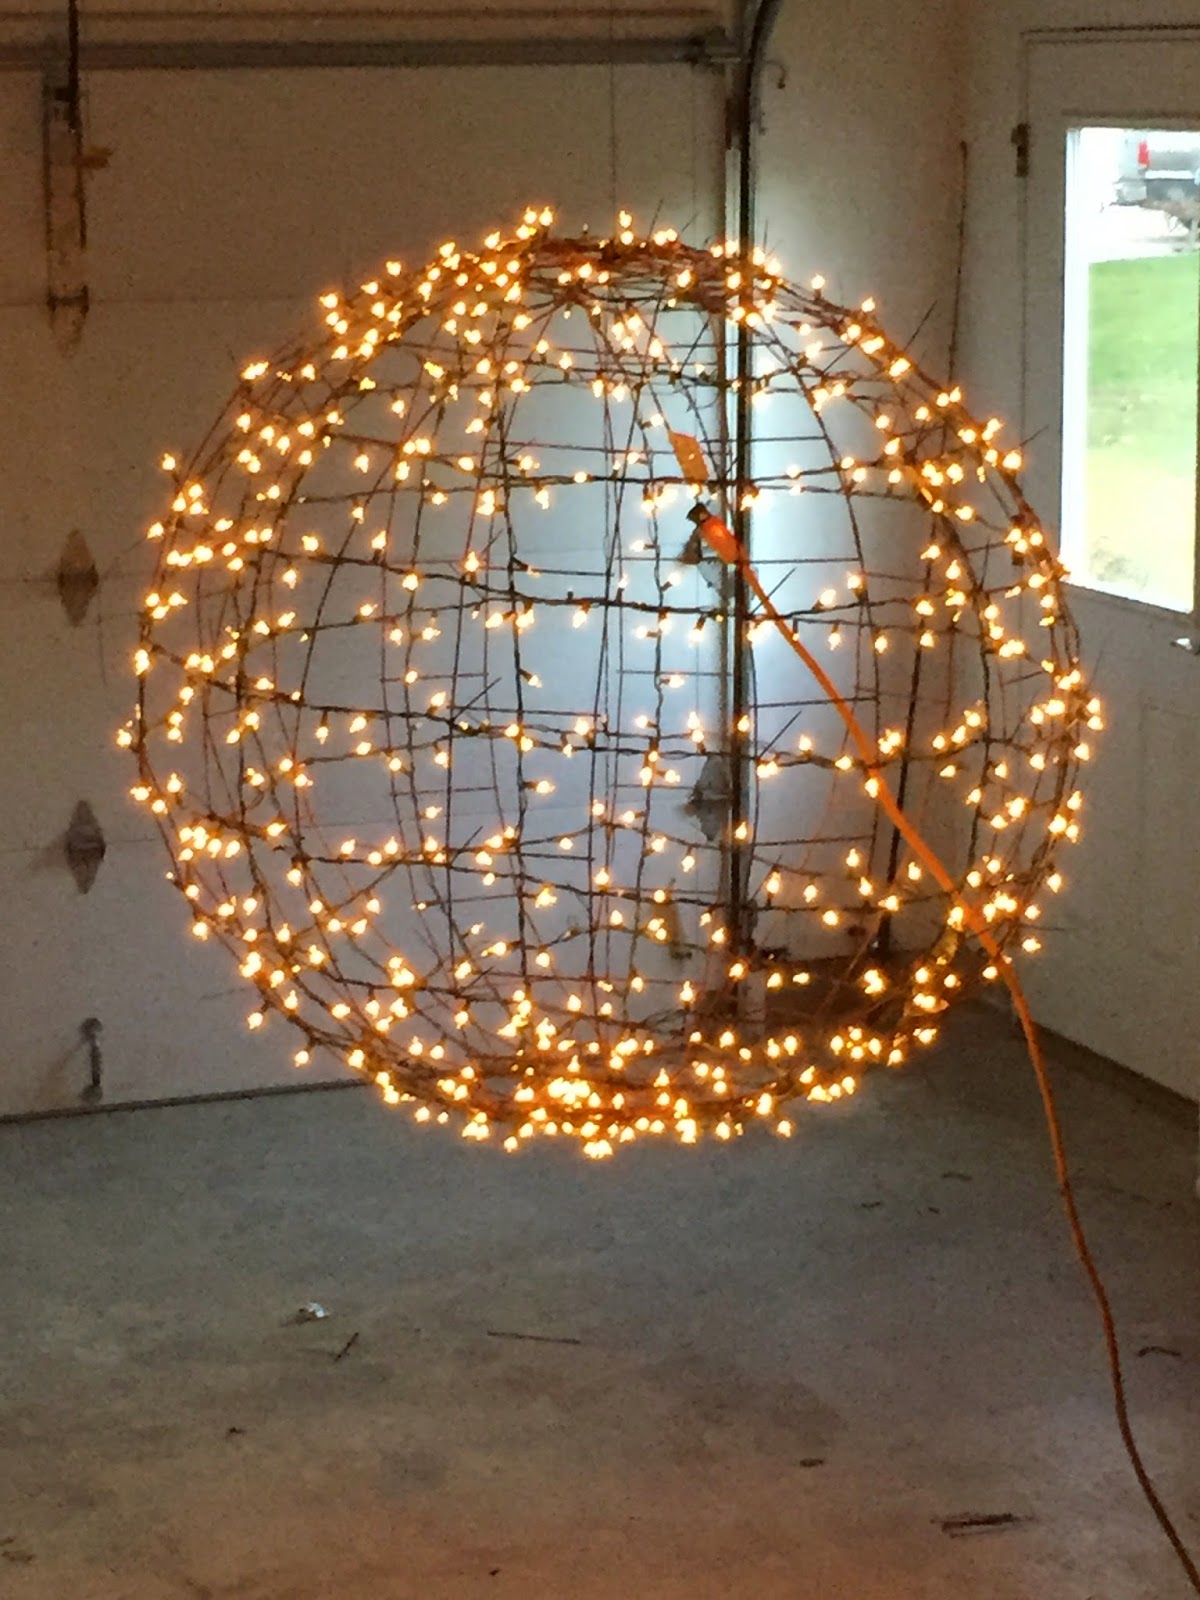
You're going to lay your pieces out on the ground in a "star" crisscrossing each other in the center, evenly spaced using four strips and zip tie them together, that'll be the bottom of your orb. Grab the other ends pulling them upward to form the top and zip tie them together to form the ball. Hint: use a hanger of some sort as a second pair of hands to hold each strip as you pull it up.
To help them hold their shape use a straight piece of wire, form hooks on either end that'll grab the top and bottom and hold the ball in shape (so the bottom doesn't want to sag). I'll add more pictures in the coming weeks to help make this a little more clear.

Add your lights with little zip ties, hang it in the tree and grab your extension cord. You're ready to light it up!


No comments:
Post a Comment